
Ever looked at an avatar and thought, “Wait… I could make something way cooler than that”? You’re not wrong. Over 70% of Roblox players say they want more unique avatar outfits. That means your design could be someone’s next favorite look—and even better, it could earn you Robux.
Let’s get into it. The steps, tips, and tools you need to turn your creations into wearable pieces other players can’t stop buying.
Key Points:
- You can design with a free template that makes layout easier.
- Selling requires a Premium account and a simple upload process.
- Showcasing means using your profile and smart marketing moves.
- Tools like Alive Studio make editing faster and easier.
How to Sell and Showcase Custom Shirts on Roblox
Designs are only half the journey. Selling and showing off your work is where the fun—and Robux—really start. To get people buying and sharing your work, you need to approach both parts with intent. A great design without a spotlight gets ignored. A well-marketed flop still won’t sell.
You need to treat your design like an item in a digital store. It deserves attention, strategy, and a clear way for others to find it. The more you refine the upload process and presentation, the better your chances of turning creative work into a consistent Robux stream.
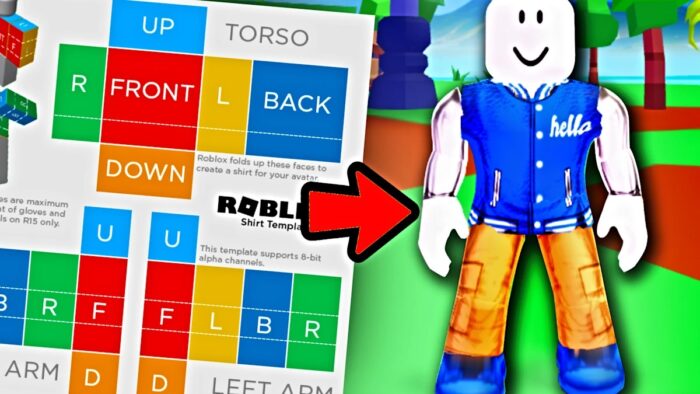
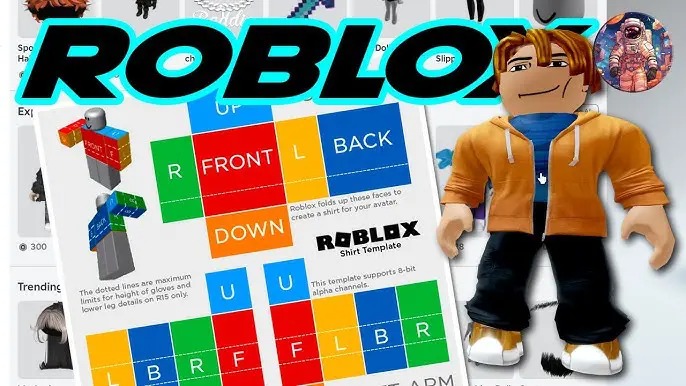
Use a Free Roblox Shirt Template to Design
You don’t need fancy tools or hours of setup to start your first design. You just need a structure that lines everything up. The Roblox shirt template handles that for you.
It’s a .png file that shows exactly where arms, torso, and necklines go. Every part is labeled, so you can place your designs right where they belong. You won’t have to keep guessing which square belongs to what sleeve. That alone saves you stress.
If you use Alive Studio, the template loads inside the editor. No need to download anything until your design feels done. That gives you freedom to test, tweak, and polish in real-time. Then you export when you’re ready to go live.
Keep it clean. Stick to the layout. Your future self will thank you.
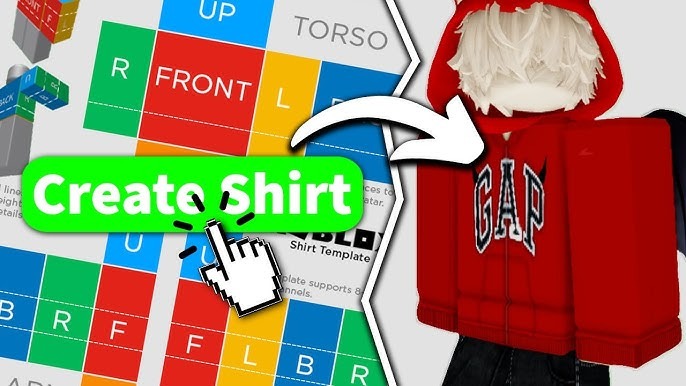
Step-by-Step Guide to Upload Your Design and Start Selling It
The upload process sounds scarier than it is. You just need to follow the steps exactly. One skipped detail can block your entire design.
Start here:
- Get Roblox Premium
You can’t upload without it. Go to the Membership page and subscribe. - Open the Create Section
You’ll find it in the main menu after logging in. - Select Shirts
That tab leads to the upload option. - Upload Your File
Make sure your .png file fits the 585 x 559 pixel rule. - Name It Smartly
Use a name that feels catchy and easy to remember. - Pay the Fee
Roblox charges a small fee for uploads. Keep Robux in your balance. - Wait for Review
Most files clear fast. Some take longer. - Toggle ‘Item for Sale’
Many skip this step and wonder why no one buys. - Set Your Price
Start low if it’s your first. Raise it once you have traction.
Follow the order. No shortcuts. The system runs smooth when you respect the flow.
Tips to Make Sure Your Shirt Actually Sells
Many creators jump straight into design without asking what makes something sell. You don’t need a big following or advanced skills to attract buyers. You need clarity, taste, and a design that speaks to your audience.
- Start with simplicity. People scroll fast. They want instant impact.
- Avoid clutter. Focus on one idea per design. Then enhance it with shadows, color contrast, or visual texture.
- Think like a buyer. Would someone wear this in a game? Does it stand out in a crowd? Keep asking that as you build.
Best Ways to Showcase Your Designs Like a Pro
Publishing your design is just the first checkpoint. The next goal is visibility. People need to see your work often enough to click it.
Use your own avatar as a walking ad. That gives your design automatic visibility on your profile. Every time someone checks your account, they see the design in context.
You can also plug it into a group. Add it to your store tab, write a short bio, and craft a catchy thumbnail. Be specific. Tell people what kind of vibe it fits—casual, funny, bold, themed.
Once it’s live, take it to other communities:
- Reddit threads where avatars get featured.
- Discord chats with feedback channels.
- TikTok or Instagram Reels with outfit montages.
Exposure adds credibility. The more you show it off, the more others want it.
Design Mistakes That Can Tank Your Whole Upload
Let’s be real—some uploads flop because of simple, avoidable missteps. You’re not alone. Everyone makes them. But the faster you spot them, the quicker your work goes live.
Most failed uploads follow the same pattern: wrong size, bad formatting, or missing toggles. Even one off-pixel in sizing can stop the whole process. Always double-check the canvas size: 585 x 559 pixels. That rule never changes.
Don’t forget to hit “Item for Sale.” Missing that toggle means no one can buy. Then there’s file type—make sure it’s a .png, not a .jpg. If you’re adding anything edgy or suspicious, it’ll likely get flagged. Keep it clean, stick to the rules, and save time.
Tools You Can Use to Make Design Easier
Design tools come in all shapes and speeds. You don’t need the fanciest software to make something that looks amazing. In fact, some free tools work better for beginners.
Let’s break down a few go-to options:
- Alive Studio – Loads your template automatically, no need for manual setup. You get drag-and-drop editing and instant previews. It’s ideal for quick testers.
- Photopea – Browser-based, but works like a budget-friendly Photoshop. Layers, masks, and all the features you need for deeper control.
- Pixlr – Good for starters. Clean interface, basic tools, easy exports.
- GIMP – Strong but intense. Best for users who want advanced control without paying for premium apps.
Pick what suits your style. Start easy, then upgrade as you grow.
How to Get Real Feedback on Your Work
Feedback turns average designs into standout pieces. Friends will say, “Looks cool!” Strangers will tell you what’s off.
You want that second one. Ask for honest opinions. Don’t just post and pray. Push for suggestions, not compliments. The more specific your question, the more useful their answer.
Don’t just stick to Roblox groups. Join avatar design threads. Drop your design in Discord channels. Make it part of a showcase video or side-by-side comparison post.
Every reaction teaches you something. Use it to shape better ideas and sharper designs.
Cool Tricks to Add Personality to Your Designs
Now it’s time to move past the basics. Anyone can make a decent design. Not everyone can make one that feels personal. Little touches matter. They create connection.
Try adding elements that feel like your signature:
- A hidden logo or phrase on the back.
- Small icons or symbols that repeat across your work.
- Use contrast not just for looks but for emotion—make parts glow, others fade.
- Create a limited series with unique color swaps.
When people see those quirks, they remember your name. That’s how you stand out.
You Made a Design. Now What?
So, you made one. Nice. But one won’t build a name. Your next step is consistency. You need a rhythm. You need an upload habit that stretches your skills and fills your store.
Here are a few simple practices that help:
- Set weekly upload goals. Just one is enough.
- Group items into mini-collections.
- Create themed drops: retro, tech-core, cute-core.
- Reward feedback with shoutouts or discounts.
Each new design sharpens your brand. You’ll grow faster than you think when you stay active and visible.
How to Build a Brand Around Your Avatar Designs
Creating designs is one thing. Building a recognizable style is another. People don’t just want single pieces—they want collections that feel connected. They want to follow creators who have a point of view.
Pick a visual style that suits you. It could be futuristic, soft pastel, streetwear, fantasy. Once you choose a direction, stick with it for a few uploads. Use similar color tones, font styles, and themes. It builds recognition.
Create a logo or tag that goes on every item. It’s a small thing that does big work. Suddenly, fans can spot your work without reading a title.
What to Do When Your Designs Don’t Sell
Sometimes nothing moves. You check the numbers. Zero. That doesn’t mean your idea failed. It means something didn’t connect yet.
Start by reviewing the obvious:
- Is the item actually for sale?
- Does the thumbnail look clickable?
- Are you sharing it anywhere?
Then ask people you trust for feedback. Post comparisons. Try price drops for a week. Track what happens. Often, one small tweak opens the floodgates.
Silence doesn’t mean failure. It means your next smart move will matter more.
How to Stay Inspired When Design Blocks Hit
Every creator hits dry spells. You open the file and nothing feels right. That’s normal. Don’t quit. Change the approach.
Step away and browse designs by others. Screenshot what grabs your eye. Don’t copy—analyze. Ask what makes it work. Is it the color? The spacing? The idea?
Also, take a break and sketch ideas offline. Even bad sketches give you direction. Try themes: candy, robots, clouds, neon cities. Don’t wait for inspiration. Build a list of ideas and chase them down.
Summary: Your First Sale Is Just the Start
You’re not making files. You’re building a creative space others want to wear. That takes more than talent. It takes patience, tools, and hustle.
Start now. Use the Roblox shirt template. Nail the upload. Share it everywhere. Fix the flaws. Add personal touches. Take every bit of feedback seriously.
Nobody starts perfect. But every design you publish puts you one step closer to fans, Robux, and respect in the community.
Don’t wait for the right moment. Create it.


